How to check the heat exchanger for leaks without disassembling the equipment
Ever wondered what a single, invisible crack in a heat exchanger can do? Viravix Engineering knows how to spot it and avoid costly repairs. We will tell you how to quickly and inexpensively inspect your heat exchanger. Heat exchanger audit for 300 euros.
Environmental friendliness, safety and high productivity are the main factors in the production of quality food products.
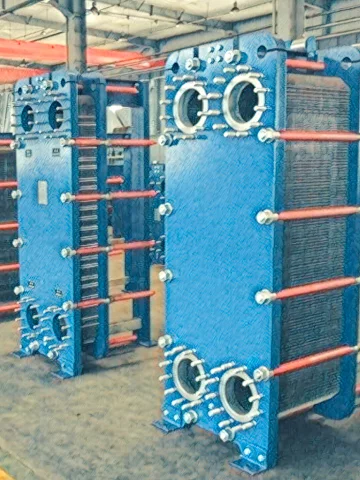
Reliable operation of the equipment ensures the quality of production. Heat exchangers operate in unstable wet environments under extreme temperatures and chemical compounds.
Over time, the risk of imperceptible defects smaller than an air molecule increases.
Untimely replacement of a damaged element has a negative impact on product quality and inevitably leads to equipment failure and industrial injuries.
Types of damage of plate heat exchangers
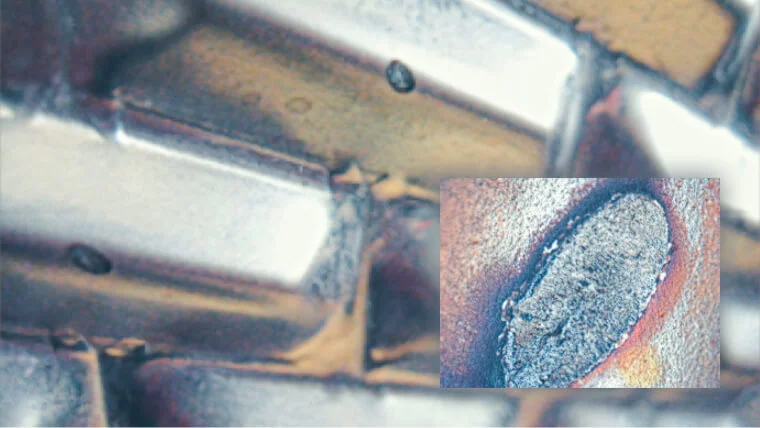
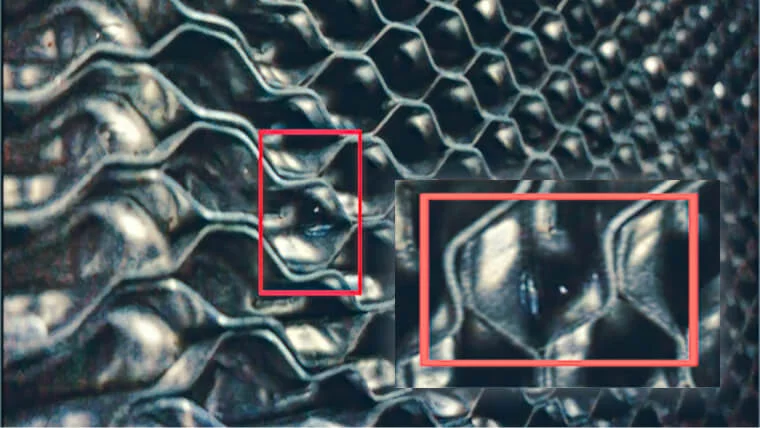
Pitting
Causes:
- Large temperature variations;
- Aggressive chemical load.
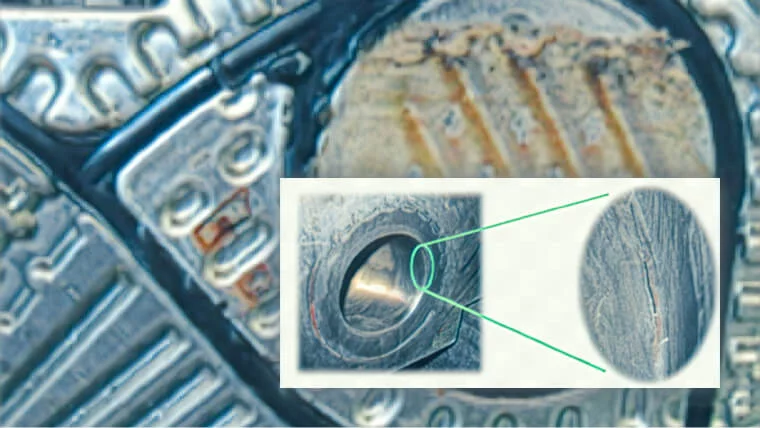
Microcracking of plates
Result of undetected pitting in time.
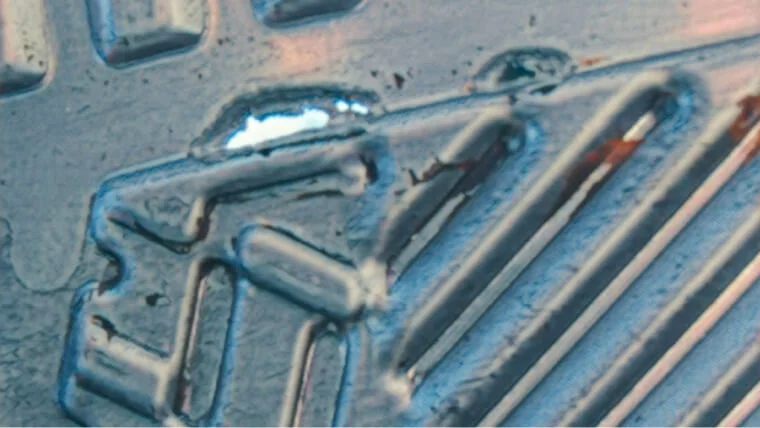
Through holes
Causes:
- Untimely opening or closing of shut-off elements;
- Untimely start-up of pumps.
Consequence: damage to the plates as a result of hydraulic shock.
Breach of airtightness
Reasons:
- the plate pack was not tightened to the design value.
- exceeding the maximum operating temperature of the FTP.
Consequence: one or more rubber seals are pressed out of the plate pack when the pressure rises in the FTP circuits.
These companies trust us with their heat exchangers


How to detect a hidden defect
in a heat exchanger?
1.5 hours Testing time
of one heat exchanger section
4 hours Readiness
detailed report
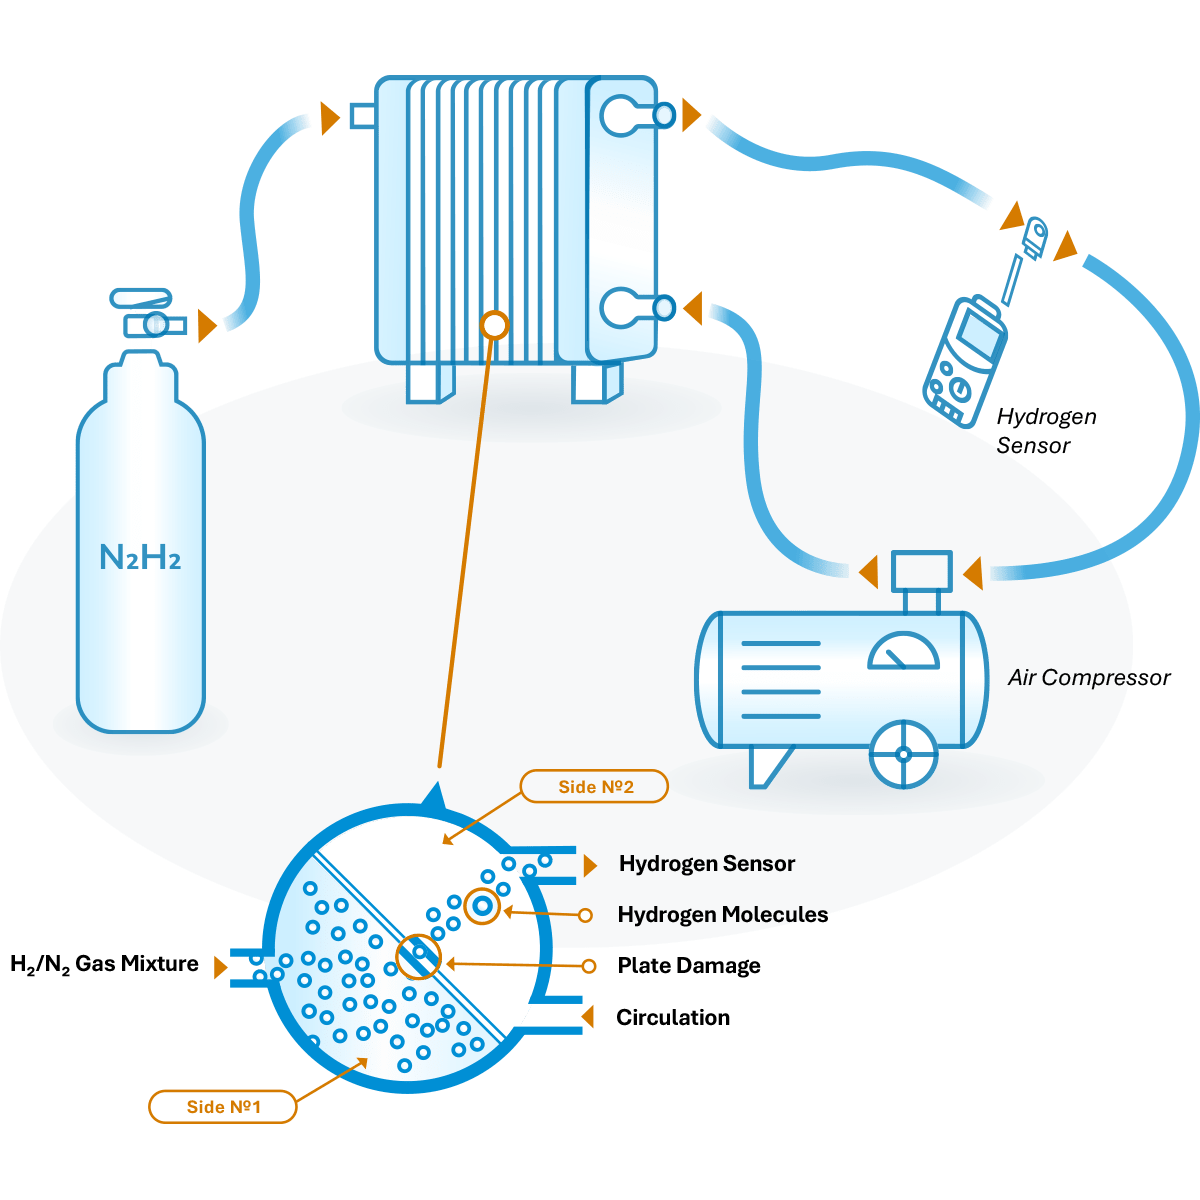
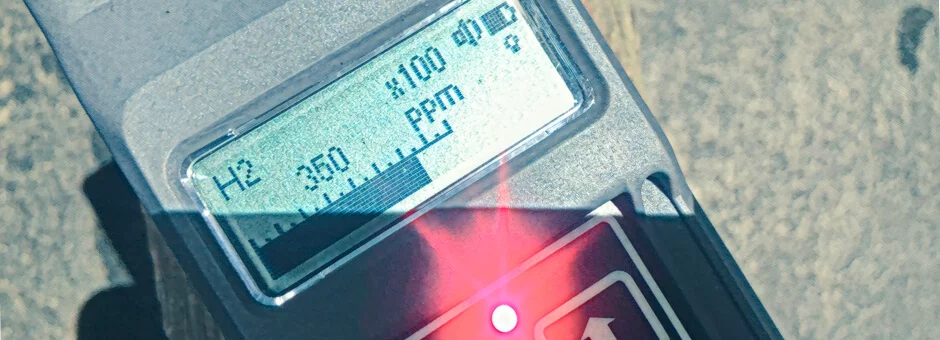
The technology of non-disruptive testing with H2N2 safety gas.
99% Leak detection guarantee
300€ Average cost
test of 1 section
Video about checking the heat exchanger for leaks
GasTest —
no time for a quest
Stages of heat exchanger testing
Preparation
- CIP washing of heat exchangers.
- Disconnection of product pipework and utilities.
Testing
- On one side of the heat exchanger, a safe moulding gas (hydrogen 10% + nitrogen 90%) is launched.
- On the other side, air is circulated in a closed loop by means of a diaphragm pump.
- If a defect exists in the wafer, hydrogen molecules will penetrate the side of the circulating air mixture at the leakage point.
- The instrument will record the size of the defect as well as the rate of leakage of hydrogen molecules in the damaged plate.
- Check the heat exchanger seals over the entire surface.
Report
- Confirmation of the presence or absence of damage.
- The size of the detected defects.
- Photo-fixation of leakage damage on seals.
- Recommendations for defect elimination and further operation.
Why is a gas test better than a disassembly?
Disassembly of the equipment followed by visual inspection of the plate heat exchanger is not expensive.
However, during disassembly
- Downtime is inevitable (up to 3 days).
- There is a high risk of damage to seals and plates.
- Even suitable seals must be replaced (up to 7000 euros per set).
- Increased labour costs for company personnel.
- Micro cracks cannot be visually identified.
Table of comparison of heat exchanger testing methods
| Testing methods | Through hole | Microcrack > 30 microns | Microcrack < 30 micron | Corrosion | Material fatigue | Condition of seals |
|---|---|---|---|---|---|---|
| Hydraulic test | ||||||
| Hydrochemical test | ||||||
| Colouring test | ||||||
| GasTest N2H2 |
Advantages of the gas test for checking the tightness of the heat exchanger
Reduces the risks associated with product quality.
Identifies a problem before the company suffers a loss.
Uses environmentally friendly hydrogen at a safe concentration of 10%.
It has better efficiency (9 times) than other indiscriminate tests.
Eliminates media overflow and refrigerant dilution.
Saves the labour costs of in-house personnel by 95%.
Does not require additional water consumption.